Interoperability with MDA 8
The Connect feature in MDA 8 connects to a live running instance of
EHANDBOOK-NAVIGATOR.
Compatibility of EHANDBOOK-NAVIGATOR with MDA:
The following table shows the compatibility details of connecting EHANDBOOKNAVIGATOR
to MDA.
| EHANDBOOK-NAVIGATOR | ||||
|---|---|---|---|---|
|
|
|
||
|
|
Yes |
Yes |
Yes |
|
Yes |
Yes |
Yes |
|
|
Yes |
Yes |
Yes |
|
|
No |
No |
No |
|
The scenarios listed below are considered while connecting from MDA 8 to EHANDBOOK-NAVIGATOR:
-
If no instance of EHANDBOOK-NAVIGATOR is running, then the highest version of EHANDBOOK-NAVIGATOR is started. It prompts you to select the corresponding documentation file (
*.ehb) for the currently loaded measurement file in MDA 8. -
The loaded EHANDBOOK file name is taken from the running instance and used to preset the file selection. But, it’s possible to choose a different EHANDBOOK file before connecting.
-
If the multiple instances of EHANDBOOK-NAVIGATOR are running, then it connects to the highest version of EHANDBOOK-NAVIGATOR.
-
It is also possible to reconnect it if it was disconnected.
When an engineer loads the measurement file and connect to EHANDBOOK, he can view/inspect the results in both the EHANDBOOK and MDA 8 Products. The advantages are listed below:
In MDA 8:
-
shows the change of signal values over time in the oscilloscope
-
easy zoom-in or zoom-out the oscilloscope
-
easy moving forth and back in time
-
two cursors are now available for offline measurement. Associated measurement values are prefixed with A or B to show to which cursor they belong.
-
When EHANDBOOK is connected, it is possible to request to show the documentation of a signal in MDA 8. The signal name is searched in the currently loaded EHANDBOOK files.
In EHANDBOOK-NAVIGATOR:
-
shows values for a single point in time
-
shows the interdependency of signals in interactive models (how the values are created)
Use case for the Engineer
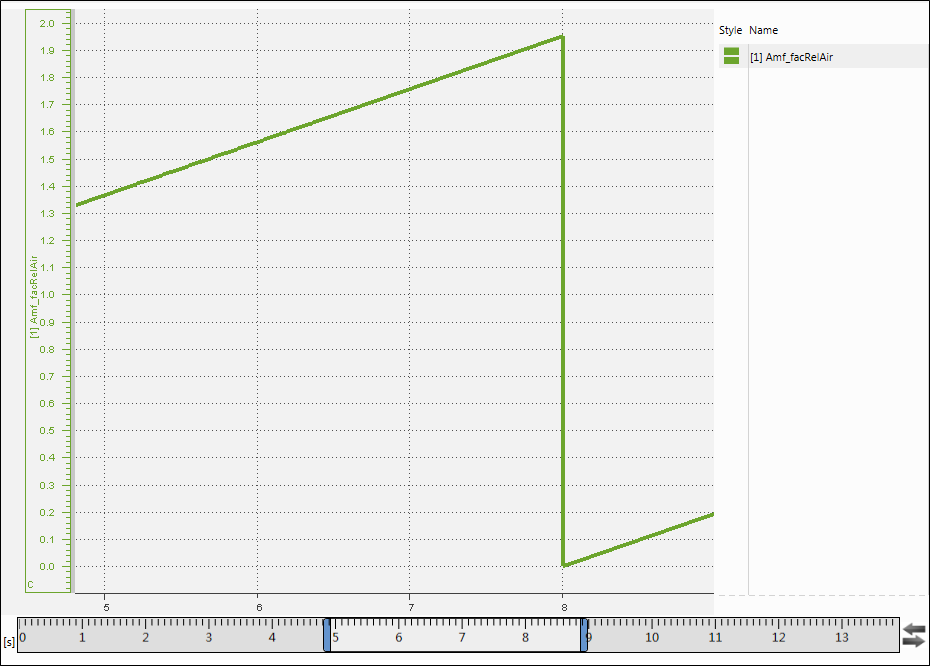
The signals were recorded during a test drive (e.g. with INCA) and the recorded
values are now to be checked for correct/expected signal values over time.
The engineer loads the recording (e.g. a measurement file of *.mf4 format) into
MDA 8 and adds some signals to an oscilloscope for inspection. If some values do
not have the expected value pattern or exceed certain limits, then engineer
wants to check with the documentation for the cause. So he connects with
EHANDBOOK and selects the corresponding documentation file (*.ehb) for the
currently loaded measurement file. Automatically the corresponding document in
the EHANDBOOK is looked up.
Loading Documentation from MDA 8
This describes how to visualize the signal values over time in MDA 8 and look up the related data in the corresponding documentation in EHANDBOOK.
-
Launch MDA 8 Product and load the measurement file in it.
-
Add the signals from the file to an oscilloscope.
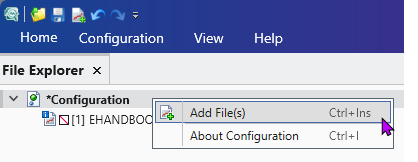
-
Click
 button in the toolbar.
 -
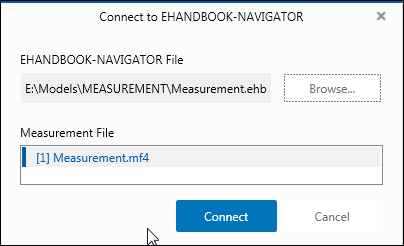
Connect to EHANDBOOK-NAVIGATORdialog box is loaded with the selected documentation file (*.ehb) and measurement (*.mf4) file. If it is not selected, clickBrowseto select the*.ehbwhich needs to be selected first time. But in future, all the further connect actions will remember the previously selected documentation file.
-
Click
Connectto connect it. TheConnectbutton is enabled only when the measurement file is loaded. -
Measurement and Calibration Filesdialog box is displayed in EHANDBOOK for confirmation.

-
Click Load.
The corresponding documentation is loaded in the EHANDBOOK.
Loading the Measurement Data Manually
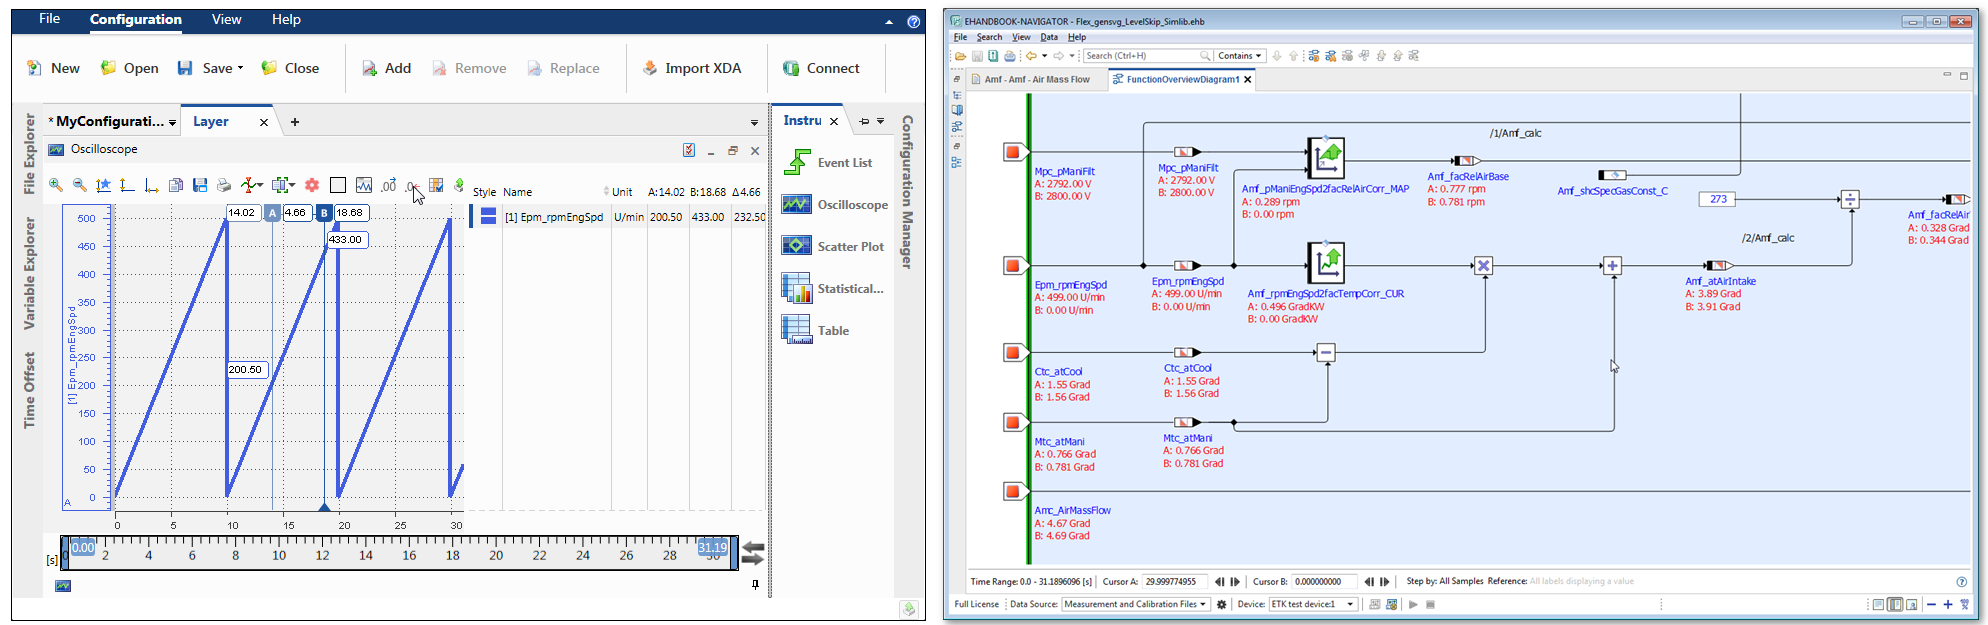
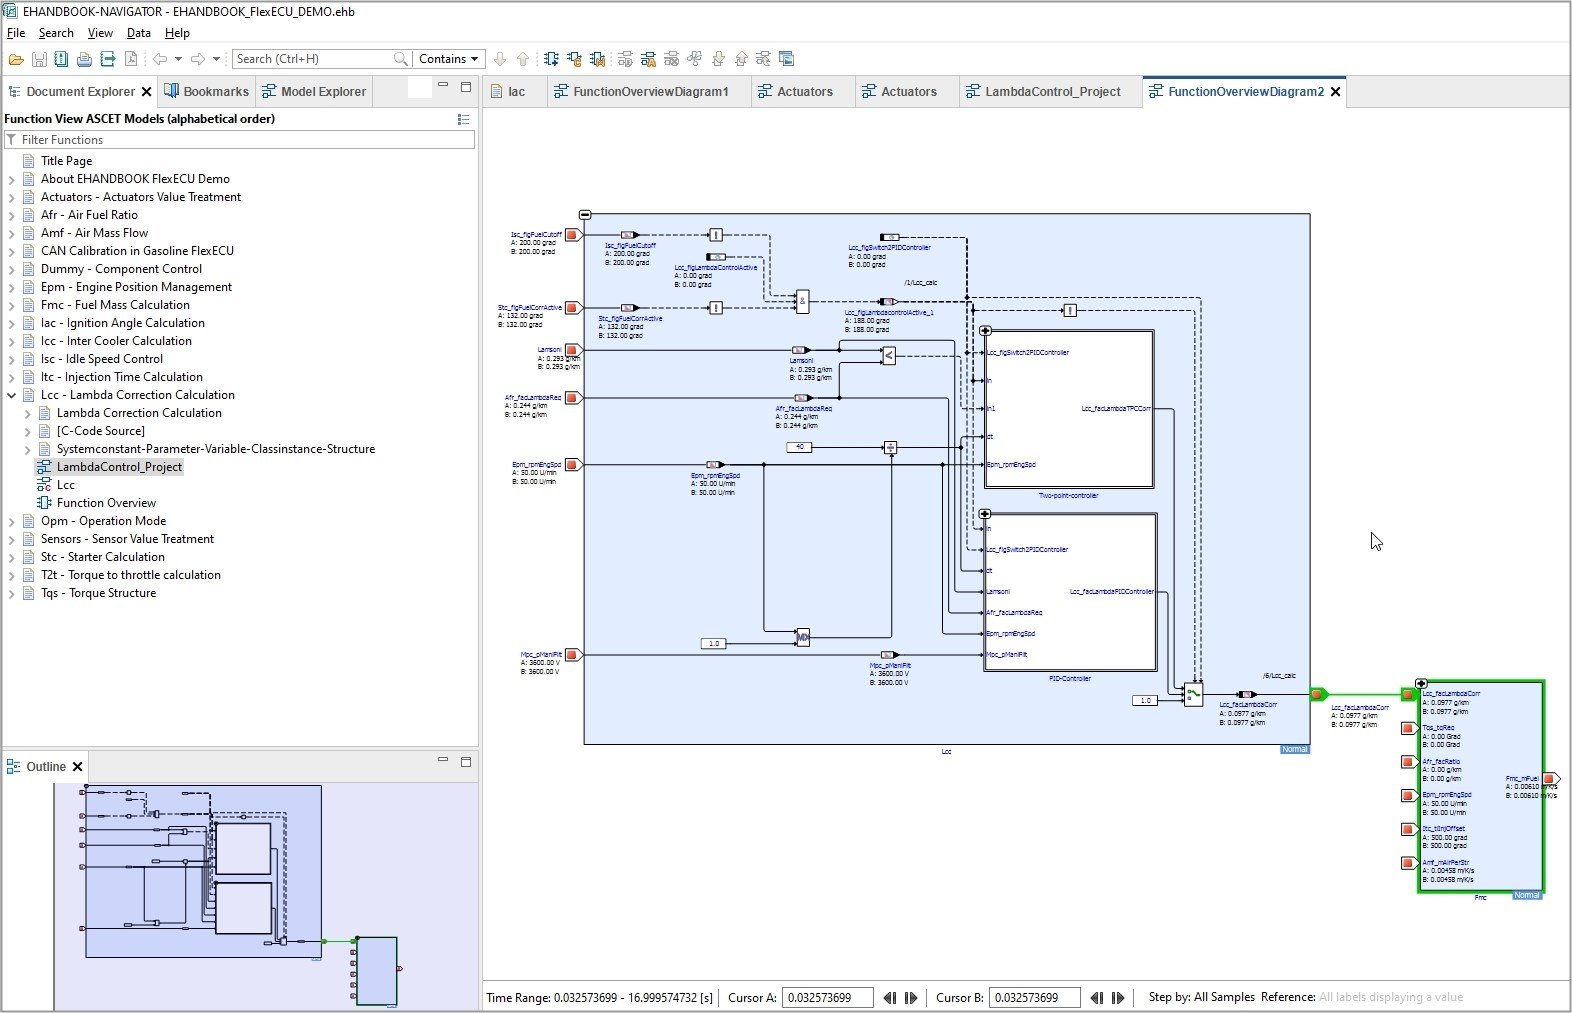
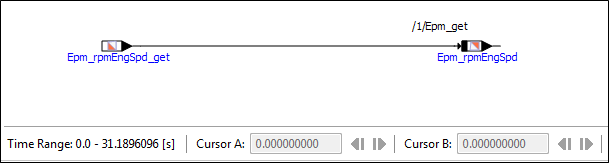
A calibration engineer navigates to the right topic and opens the interactive model containing the signals under investigation. There, values can be added to the model in which he/she is interested to investigate. Now in MDA 8, you can add the two cursors (Cursor A and Cursor B) for offline measurement. The associated measurements values are prefixed with "A:" and "B" to show to which cursor they belong to.
-
Click
Add Cursorsto add the new cursors to the oscilloscope to mark the points in time.

-
Here is a side-by-side view of both the products. Right side view is the EHANDBOOK which shows the documentation where left side view is the MDA 8 which shows the value over time.
-
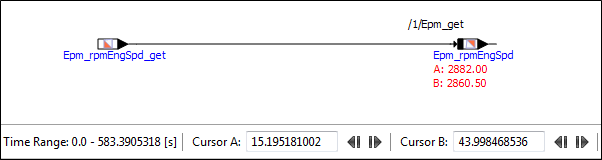
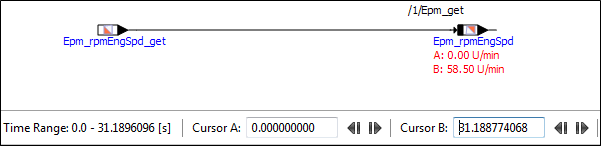
Right click on any of the cursors to send the exact point in time to the EHANDBOOK.
A context menu is displayed.

-
Click
Send Time to EHANDBOOK-NAVIGATOR.
The values are sent to EHANDBOOK. This time value is taken over and is used to display the values for all marked label names. It displays the "Time range", "Cursor A", "Cursor B", and then "Step by" values. The time value is given in seconds. When you send a point in time of a MDA 8 cursor to the connected EHANDBOOK-NAVIGATOR, the value is automatically assigned to Cursor A.
-
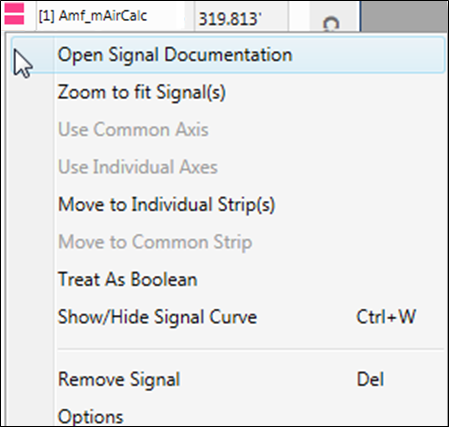
When you connect EHANDBOOK, it is possible to request to open the documentation of a signal in the currently loaded documentation in MDA 8.
-
Right-click on a signal and click
Open Signal Documentationin the context menu to display the signal documentation.
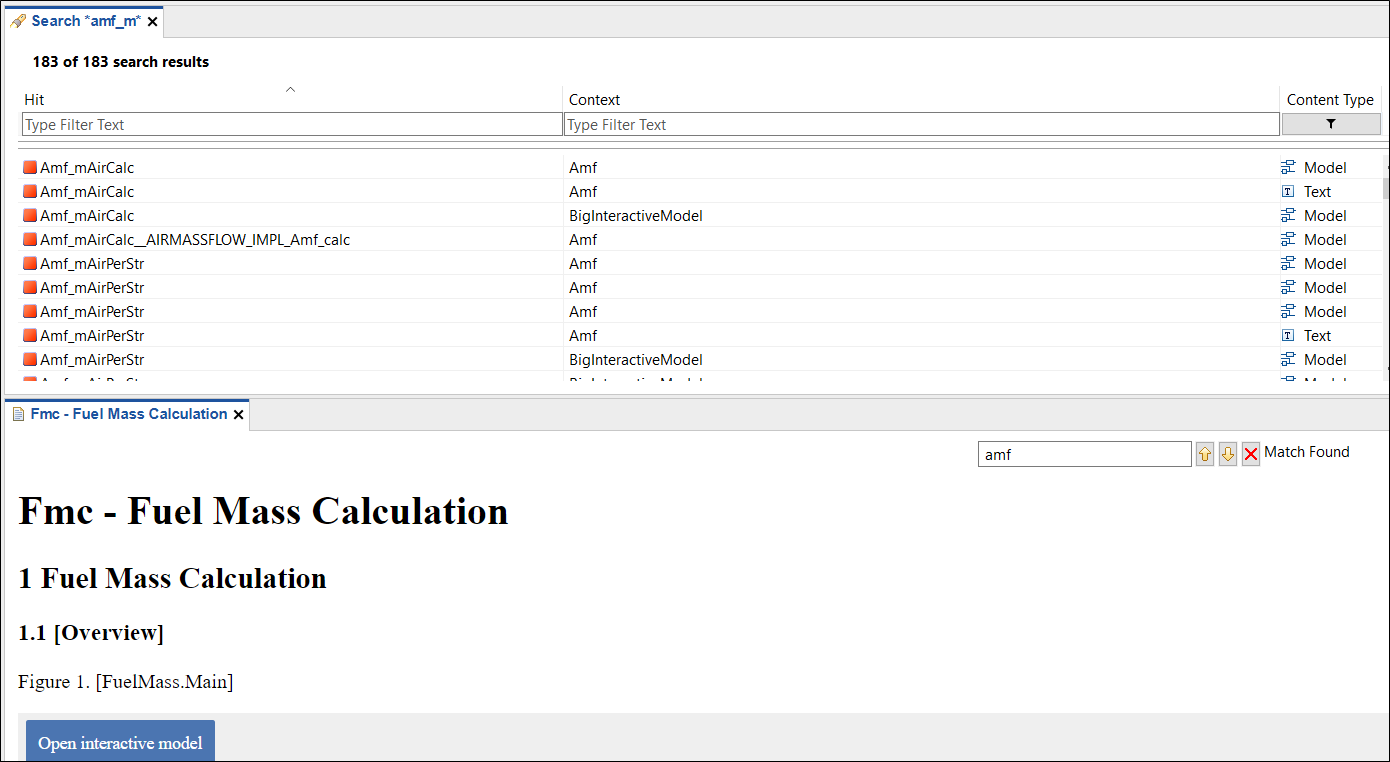
When you click on this feature, it searches in all loaded EHANDBOOK files for that particular signal and displays all the occurrences in the "Search Results" view in EHANDBOOK. Now, you can find and double-click on it to open from the "Search Results" view. This helps to focus on the value and the documentation simultaneously.
Replacing Measurement File
Replace measurement file feature in the MDA 8 helps to replace a measurement
file (*.dat/*.mf3/*.mf4 file) in the MDA 8 and the replaced file will also
be updated in the EHANDBOOK-NAVIGATOR also.
User scenario:
The example below describes the user scenario how this feature useful for a calibration
engineer.
For example, the calibration engineer starts the measurement with the recordings
and connects to EHANDBOOK-NAVIGATOR. Then, the engineer wants to
check the recordings on the next day. He replaces the measurement file with the
latest recordings by using Replace measurement file feature in the MDA 8. The
new measurement file is updated on the EHANDBOOK-NAVIGATOR also without
asking the confirmation.
When a new measurement file is replaced in the MDA 8, the following changes
are also performed in the EHANDBOOK-NAVIGATOR.
-
All label values are removed
-
Both the cursors are cleared
-
The new time range is calculated
The engineer has to click on Display all values to add the values back to the interactive
models.
To replace a measurement file:
-
Load the measurement file in MDA 8 and click
button in the toolbar
to connect to EHANDBOOK-NAVIGATOR.
Connect to EHANDBOOK-NAVIGATORdialog box is loaded with the selected documentation file (*.ehb) and measurement file (*.dat/*.mf3/*.mf4file). -
Click
Connectto connect it.
EHANDBOOK-NAVIGATOR is connected with the loaded measurement file for the selected project with all the values.
-
Go to File Explorer in the MDA 8, select the measurement file (
*.dat/*.mf3/*.mf4file).

-
Now, click
 icon to Replace the measurement file.
Windows Exploreris displayed to select the new file for replacement. -
Select the new measurement file and click
Open.
The file is replaced in MDA 8 and the same is updated in the EHANDBOOKNAVIGATOR also.
The changes reflected in the EHANDBOOK-NAVIGATOR after the replacement of the new measurement file are:
-
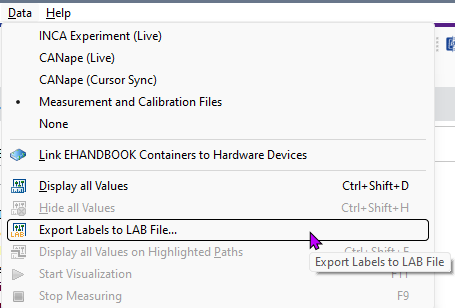
In the
Measurement and Calibration Filesdialog box and can be seen when you open it from theDatamenu.

-
All label values are removed and both the cursors (Cursor A & Cursor B) are cleared.
-
The new time range is calculated.
Terminating an instance of EHANDBOOK
The  button will disconnect the connection between MDA 8 and
EHANDBOOK without terminating the running instance of EHANDBOOK. Exiting
MDA 8 or EHANDBOOK product will disconnect implicitly.
button will disconnect the connection between MDA 8 and
EHANDBOOK without terminating the running instance of EHANDBOOK. Exiting
MDA 8 or EHANDBOOK product will disconnect implicitly.
Exporting Labels to a LAB File
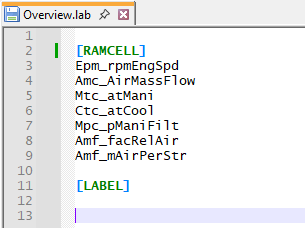
Exporting labels is enabled for interactive models where at least one labels is considered to be a valid entry for the [RAMCELL] section or the [LABEL] section of the LAB file.
To allow for high compatibility the LAB file is written in the version 1.0 format which does not contain information on raster or device names for the labels. The LAB file content may look like the following:
Export Labels to LAB File… is placed in the Data main menu or it can be also found as a button in the toolbar at the bottom of the window. It’s enabled if an interactive model is opened and at least one label is considered a valid entry for a LAB file. After a click on the menu entry or the button select an existing LAB file or give the name and location of a new LAB file to store the labels. Use the lab file by adding it your existing to MDA 8 configuration.
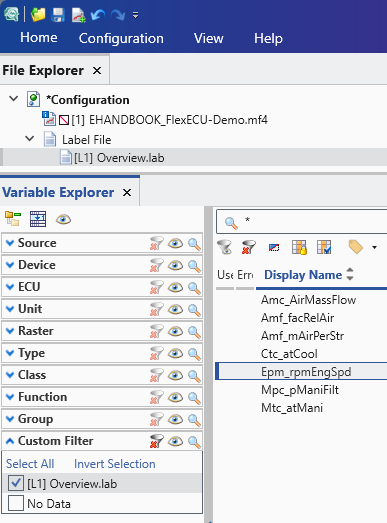
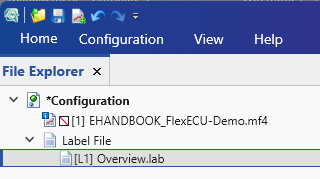
Working with LAB File as Filter
When working with a measurement file containing a vast number of signals using a LAB file as filter allows to focus on a certain function or detail of a function.
Since MDA 8 Version 8.6 additionally loading a LAB file solves this issue.
After loading a measurement file load a LAB file too. In the Variable Explorer tab expand the Custom Filter and check the entry for the loaded LAB file. The LAB is used as a filter for the signal in the measurement file.
This approach allows to focus on a specific set of signal even when many signal are available.