Devices And Rasters
Linking of the Hardware Devices
The EHANDBOOK-NAVIGATOR supports linking of the documentation either to a single device or multiple devices. This is needed while handling the visualization of the labels and values coming from INCA or from a measurement and calibration file.
When a single EHANDBOOK file (container) is loaded, you can decide which
device should be connected to look for a value (one to one mapping). In case of
an EHANDBOOK project which contains multiple containers, then you need to
decide which file needs to be connected to which device (many to many mappings
if multiple devices connected or many to one if a single device connected).
For example, if you combine the engine documentation and the gearbox documentation
as both measure the engine speed but with the different devices. In
this case, single device approach fails because either the value in the engine documentation
is right, but for the gearbox value is wrong or vice versa. With the multiple
devices setup, you can select the right devices for the engine
documentation as well as the gearbox documentation.
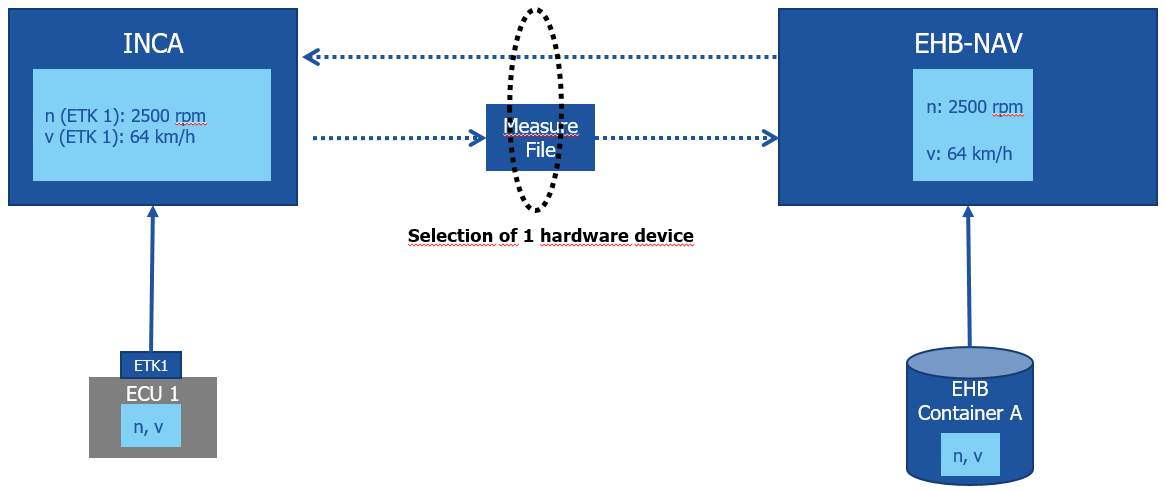
Single device support in EHANDBOOK-NAVIGATOR (an overview).
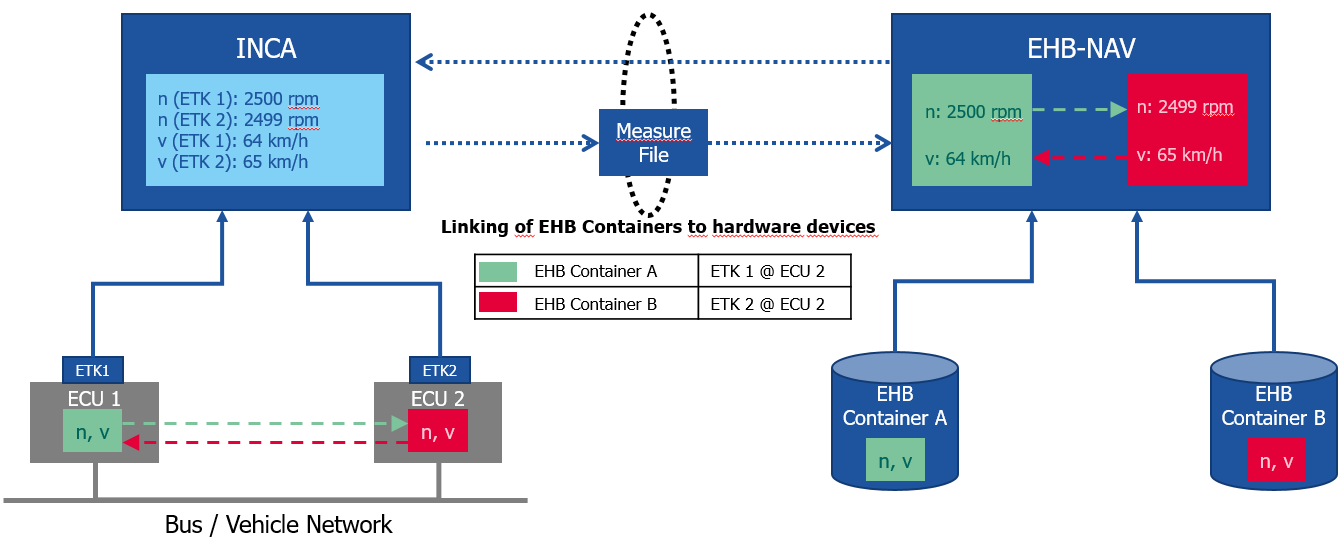
Multi-device support in EHANDBOOK-NAVIGATOR (an overview).
The steps given below shows how to link the device(es) for online or offline measurement
data.
To link the hardware device(es):
-
Connect to an INCA experiment Connecting to INCA Experiment or load the Measurement and Calibration files Visualization of Offline Measurement.
-
When you connect to an INCA/load the Measurement and Calibration Files,
Link EHANDBOOK files to Hardware Devicesdialog box is displayed.
<Or> -
Link EHANDBOOK Files to Hardware Devicesbutton is enabled. -
Click
 .
.
-
-
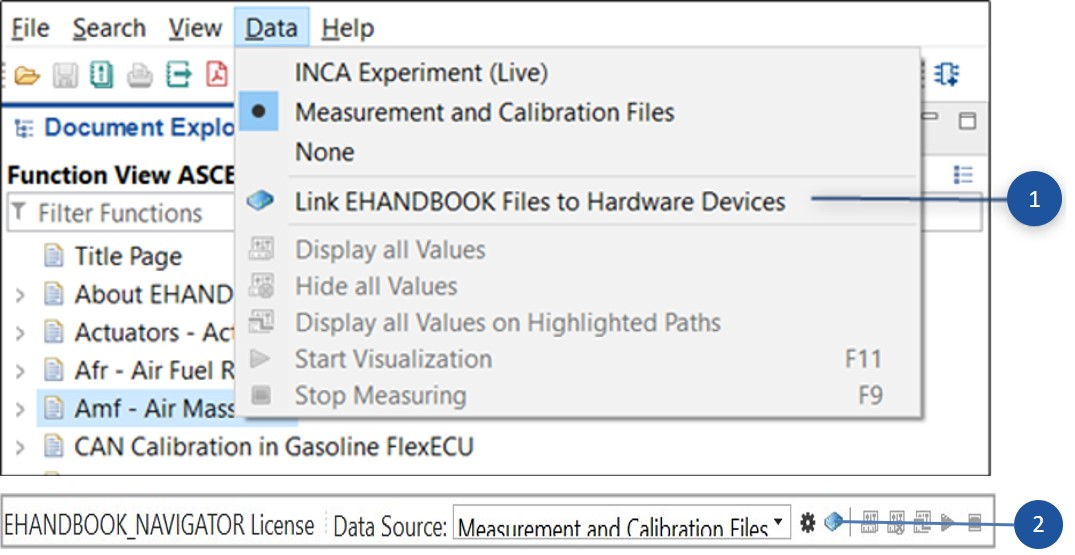
Connecting through Menu item
-
Connecting through Status bar
-
The
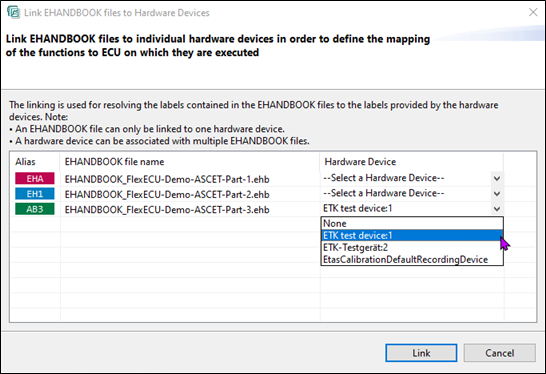
Link EHANDBOOK Files to Hardware Devicesdialog box is displayed.
-
Select the right devices for the corresponding EHANDBOOK files from the "Hardware Device" drop-down menu.
-
Click
Link.
The devices are linked to the selected files. Based on the device selection, the values are displayed in the EHANDBOOK-NAVIGATOR.
Displayed values based on the value selection.
-
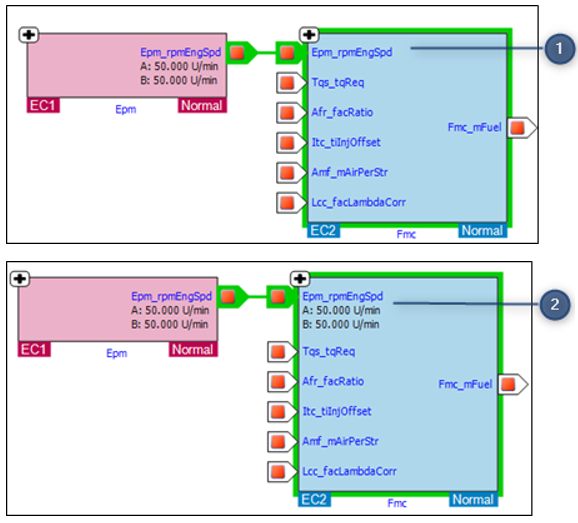
An example - A device selected only for a single file
-
An example - Different devices are selected by both the files
Raster Selection
EHANDBOOK-NAVIGATOR allows you to pre-select a raster when a default raster is not defined for the variables in an A2L file, or if you want to assign a new raster or change the pre-set raster for each device. The default raster can be changed at any time, and such changes will only affect future variable allocations.
This feature also provides the option to select alternate rasters in case a label
cannot be assigned to its default raster, because it has reached maximum capacity
or cannot accommodate additional labels. Depending on the selection, the
labels will then be assigned to an alternate raster.
The raster selection can be performed in the following ways:
-
Multiple devices
-
Raster Pre-Selection
-
Raster Overflow Selection
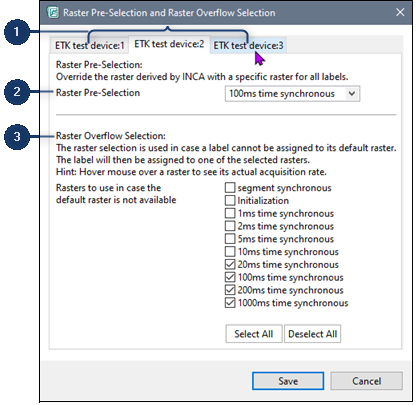
Raster Pre-Selection
To pre-select the raster:
-
Click
Select the rasters available for automatic associationin the status bar.
Raster Pre-Selection and Raster Overflow Selectionwindow is displayed. -
Choose the required raster from the
Raster Pre-Selectiondrop-down menu. -
Click
Save.
The selected raster will be assigned to all the labels.
|
Rasters can be configured independently for multiple devices. |
Raster Overflow Selection
To select rasters in case of an overflow:
-
Click
Select the rasters available for automatic associationin the status bar.
Raster Pre-Selection and Raster Overflow Selectionwindow is displayed. -
Select the rasters from the
Raster Overflow Selectionlist. Each selected raster is sequentially attempted for variable assignment from top to bottom. If the assignment fails, the next raster in line is considered. If no suitable raster is found, a dialog box is displayed, providing a summary and a link to a log file containing details such as label names and device names.
-
Click
Save.
The selected rasters will be assigned later to the labels in case of an overflow.
|
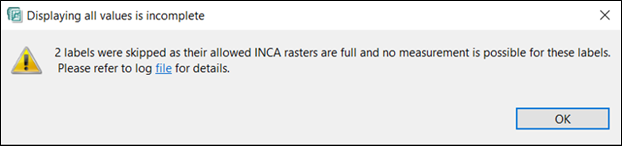
If the specified raster reaches full capacity and labels were automatically assigned to an alternate raster, a notification pop-up is displayed, providing a summary and a link to a log file containing details such as label names, device names, default raster, and the assigned raster. 
|