Live measurement with ATI Vision
EHANDBOOK-NAVIGATOR has the capability to establish a connection with a Vision project and provides a closer link between models representing the functions and, the measurement and calibration values obtained during the calibration or testing procedure.
This feature provides an integrated view of the algorithm specifications of a function (the ASCET/SIMULINK model diagram) and the values being measured in the Vision application. The values from a running Vision application for measurement variables are displayed directly in the interactive model within the Model Viewer of the EHANDBOOK-NAVIGATOR. It is also possible to configure which of the measurement variables depicted in the interactive model should display the values. Starting and stopping the measurement of the connected Vision application directly from the EHANDBOOK-NAVIGATOR is also supported.
|
If you are using EHANDBOOK-NAVIGATOR in Basic Mode (EHANDBOOK_NAVIGATOR_BASIC) or in Full Mode (EHANDBOOK_NAVIGATOR), connectivity for Vision is not supported. In order to use this feature, you need to procure an additional add-on license (EHANDBOOK_NAVIGATOR_VISION). Please look at ETAS Contacts for information on how to get an evaluation license or purchase a license. |
Compatibility of EHANDBOOK-NAVIGATOR with ATI Vision:
EHANDBOOK-NAVIGATOR V14.0 is tested and compatible with Vision versions 7.0.1 and Vision 7.0.2
NOTICE
The EHANDBOOK-NAVIGATOR may display erroneous values in an interactive model when real-time data will be retrieved from the Vision project! The real-time measurement variables can be affected. The correctness of the displayed value for measurement data has to be verified using a suitable tool. The user is responsible for correctly assigning EHB containers to corresponding hardware devices.
Read only and Edit project mode
Vision EHANDBOOK connection operates in two modes ,"Read only" and "Edit project".
-
In "Read only" mode the measurement values are only displayed only for the data items which are already part of the connected Vision project. The existing Vision project screen setup is not edited or disturbed. Once the Vision and EHANDBOOK connection is established, no new data can be included for measurement. Adding additional data items in the Vision project screen also has no effect in the inclusion. If additional data items are to be configured for measurement then Vision must be reconnected.
-
In the "Edit project" mode the measurement values are displayed for all valid data items. The labels which are configured to display on EHANDBOOK-NAVIGATOR are added to the Vision project screen in parallel. Labels can be added for measurement at any time during an active Vision and EHANDBOOK connection. Altering the Vision screens during the measurement will cause inconsistencies.

Connecting to Vision
Connecting to a running Vision application and a loaded project is the first step in establishing a link with EHANDBOOK NAVIGATOR to acquire values for the data items.
Prerequisites
Prior to connect the EHANDBOOK-NAVIGATOR to a Vision project, you must first:
-
Start ATI Vision 7.0.x.
-
Create/load a valid project.
-
Configure devices with appropriate strategy.
-
Create/load necessary screens and control objects for measurements.
-
Start EHANDBOOK NAVIGATOR and load a corresponding EHANDBOOK container.
-
Open an interactive model in the Model Viewer.
|
It is your responsibility to set up a suitable Vision project and application. EHANDBOOK-NAVIGATOR establishes a connection to the selected project workspace and application. |
To connect to an existing Vision application:
-
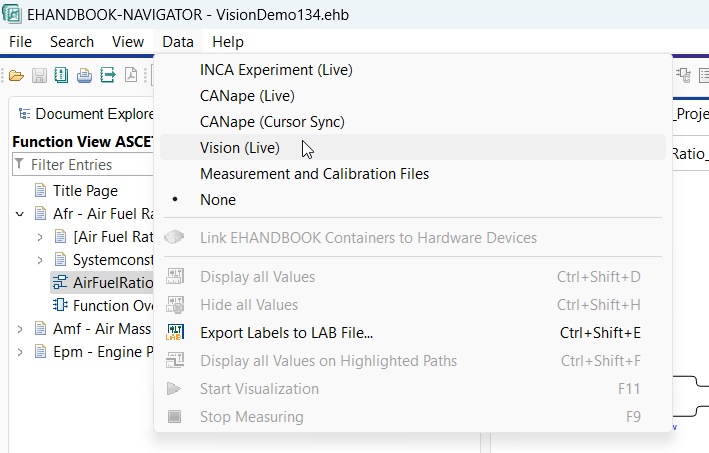
Go to
Datamenu and selectVision (Live).
<Or>
-
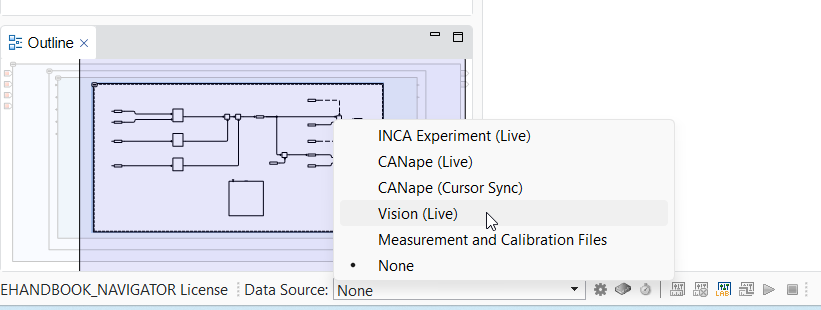
Select
Vision (Live)in theData Sourcedrop-down menu on the status bar.
The Vision (Live) dialog box is displayed with appropriate information. If
all the above Prerequisites are satisfied, then the image
shown below is displayed. The connection can then be established with Vision by clicking "Connect". If the
connection is not established, an error message(s) with appropriate instructions
are shown. Make the suggested changes to connect successfully.
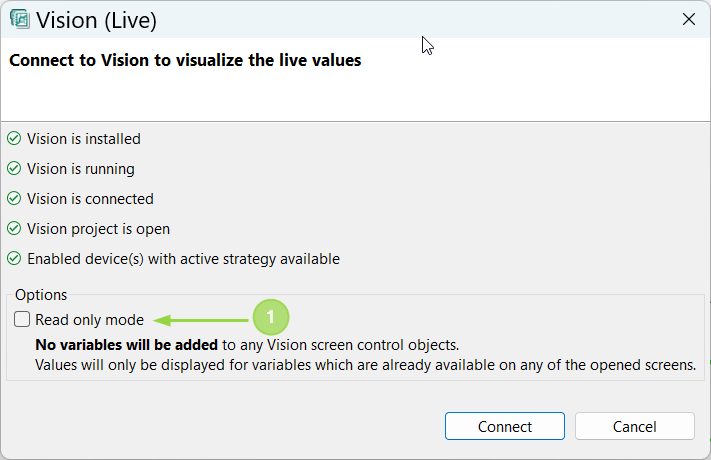
"Read only mode" checkbox for displaying values for data items which are part of existing Vision project screens. Read only and Edit project mode details. If the Vision project screens has few thousands of labels, the model navigation (incase of deeply nested hierarchy) is faster if the check box is checked. It will be much slower for the same model, if the checkbox is unselected.
-
Click
Connectto connect with Vision. -
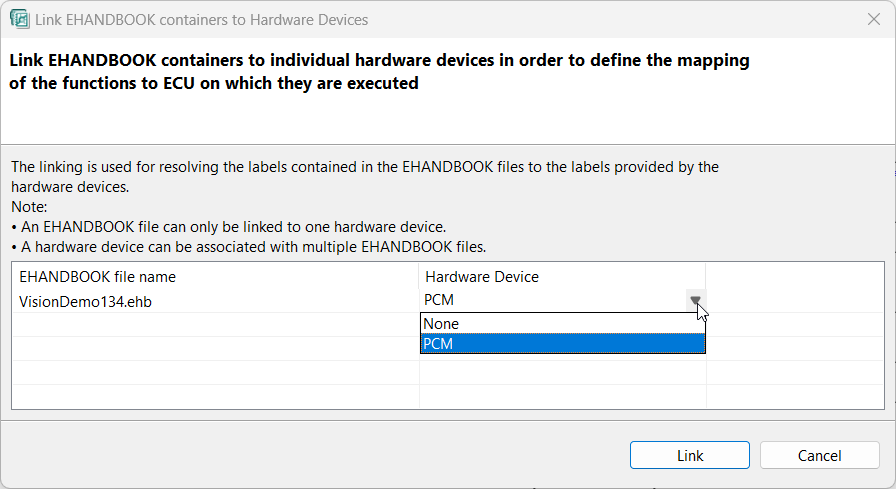
Once connected, you will see Vision (Live) active in the data source drop down. Now choose the blue icon
Link EHANDBOOK containers to hardware devices. Here choose the device which is also active for measurement in the Vision project. EHANDBOOK-NAVIGATOR recognizes only 'Enabled' devices in the Vision device manager window for connection.

|
It is the user’s responsibility to set up a suitable Vision project and devices.
EHANDBOOK-NAVIGATOR establishes a connection to the selected project and enabled valid device.
Only |
|
A single connection established with Vision is applicable for all the interactive models displayed in multiple Model Viewers. |
Configuring Model Blocks to Show/Hide Values
Before starting the visualization of measurement variables and calibration parameters, the model blocks representing measurement variables and calibration parameters must be configured to show/hide values. You have the option of configuring a single block at a time or configuring all the blocks that are visible in the interactive model, displayed in the Model Viewer. The model blocks can be configured only after a connection has been established with a Vision project.
If the connection is established in “Read only mode" then configuration can be done only for those data items which are added on the screens of opened Vision project.

Right-click on the measurement variable or calibration parameter and if Display Value option is present then it means it can be configured to measure.
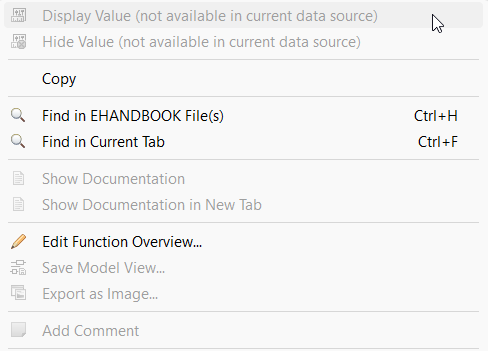
Right-click on the measurement variable or calibration parameter and if Display Value option is disabled with a message not available in current datasource then it cannot be measured.
To configure a single measurement variable or calibration parameter to show/hide value:
-
Right-click on the measurement variable or calibration parameter block you want to configure.
A context menu is displayed. -
Select
Display Valueto configure the block to display the value of the measurement variable or calibration parameter.
<Or> -
Select
Hide Valueto configure the block to hide the value of the measurement variable or calibration parameter.
To configure all the blocks, visible in the interactive model displayed in the Model Viewer, to show values:
-
Click
Display all valuesin the Status bar.
<Or> -
Go to
Datamenu, selectDisplay all Values.
<Or> -
Press <CTRL+SHIFT+D>.
To configure all the blocks, visible in the interactive model displayed in the Model Viewer, to hide values:
-
Click
Hide all valuesin the Status bar.
<Or> -
Go to
Datamenu, selectHide all Values.
<Or> -
Press <CTRL+SHIFT+H>.
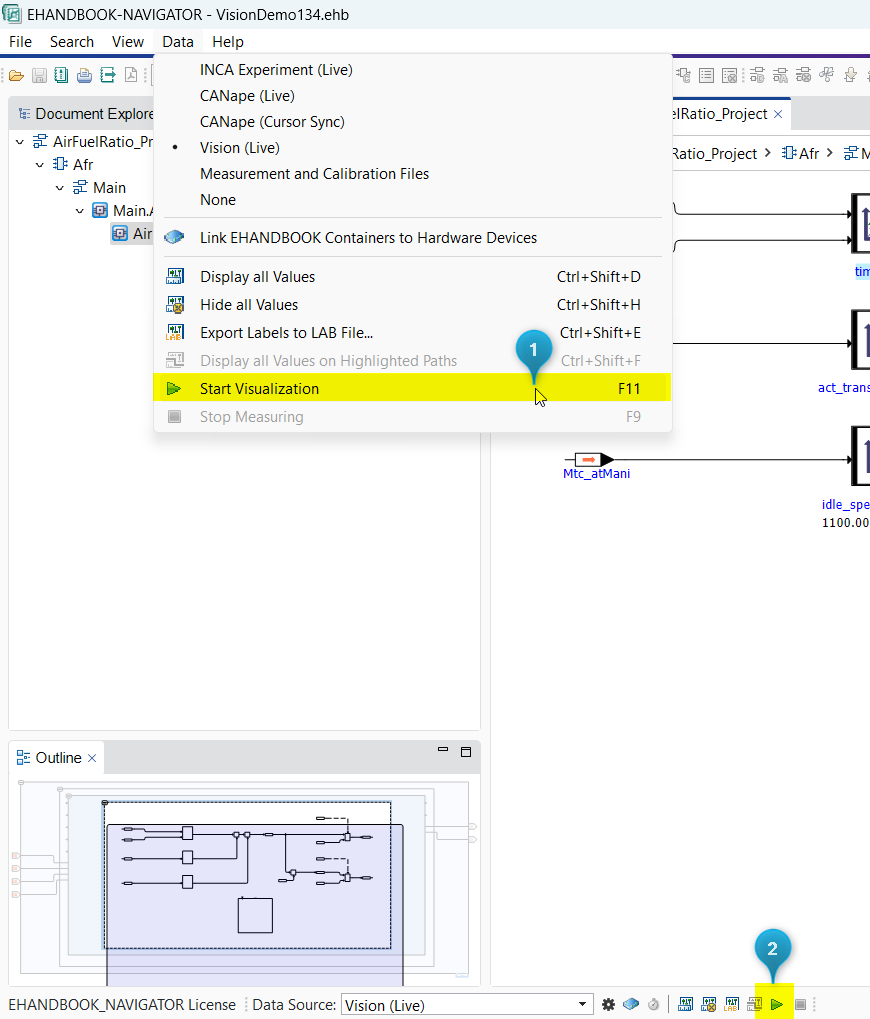
Starting the Visualization
-
Start Visualization feature in Data Menu
-
Start Visualization button in the Status bar
Setting the Vision project online or offline using EHANDBOOK-NAVIGATOR is supported.
To start the visualization:
-
Click
Start Visualization(2) in the Status bar.
<Or> -
In the
Datamenu, selectStart Visualization.
<Or> -
Press
F11. The Vision project is now online and the values for the configured blocks are being displayed and periodically updated.
|
Values for measurement variables are updated at a different rate in EHANDBOOK-NAVIGATOR when compared to the Vision project experiment. Values are fetched every 500ms. Values are not updated in real-time and might not reflect the actual value at a certain point in time. |
|
If you configure blocks of interactive models in multiple Model Viewers, visualization of values occurs simultaneously in all the loaded interactive models. |
Stopping the Measurement

-
Stop Measurement in Data Menu
-
Stop Measurement button in the Status bar
It is possible to set the Vision project offline only if the visualization has started.
To stop the measurement:
-
Click
Stop Measurement(2) in the Status bar.
<Or> -
In the Data menu, select
Stop Measurement(1).
<Or> -
Press F9. The latest values measured in the Vision project is displayed in the Model Viewer.
Disconnecting from the Running Vision project
It is possible to disconnect from the Vision project to which EHANDBOOK-NAVIGATOR has already established a connection.
To disconnect the running Vision project:
-
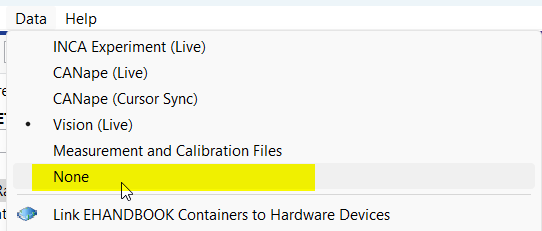
Go to
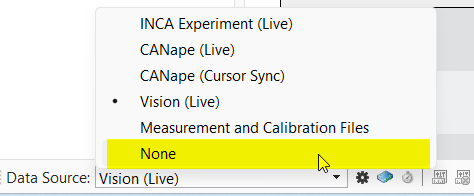
Datamenu and selectNone.
<Or> -
Select
Nonein theData Sourcedrop-down menu on the Status bar.
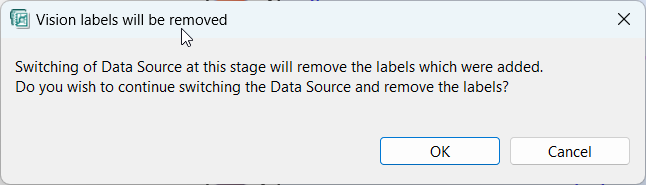
Alternatively, when another data source is connected in EHANDBOOK, all the labels that were added/measured in EHANDBOOK-NAVIGATOR will be removed.